Alternatively if you are hopeless with a hammer, sewing machine, glue or anything crafty, check out ebay, dunelm mill & t k maxx. Usually a few bargains to pick up there.
The easiest and most obvious things to make are bunting, windbreaks and cushions. You can get material cheaper than buying bespoke items and they will co-ordinate much better
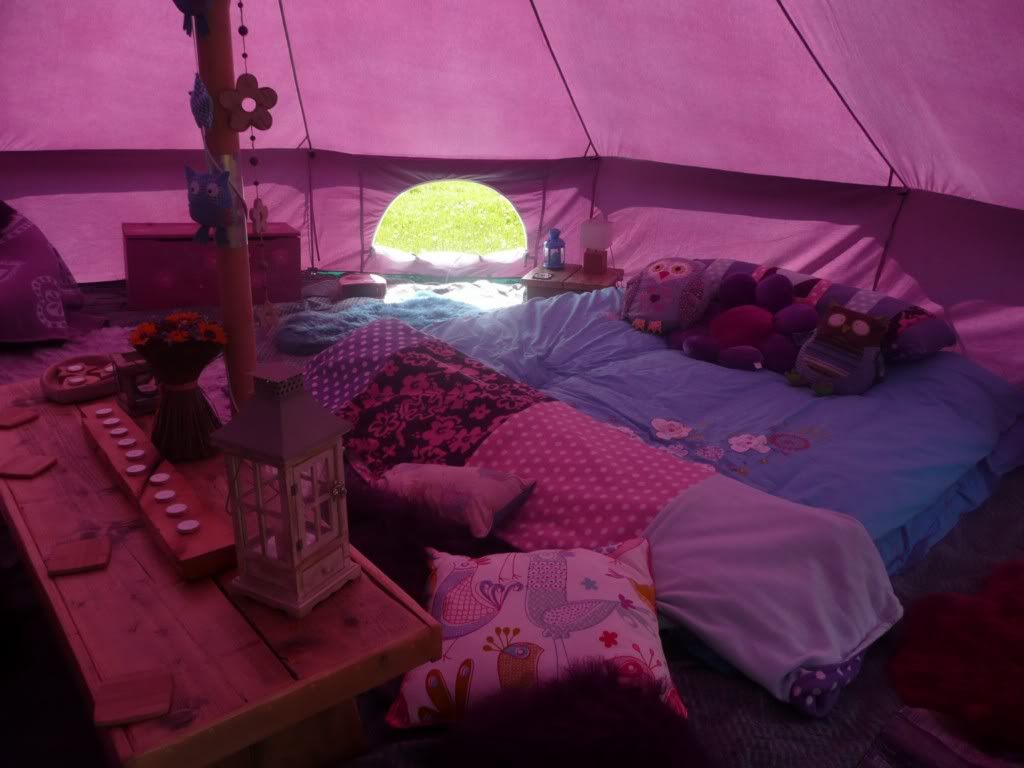
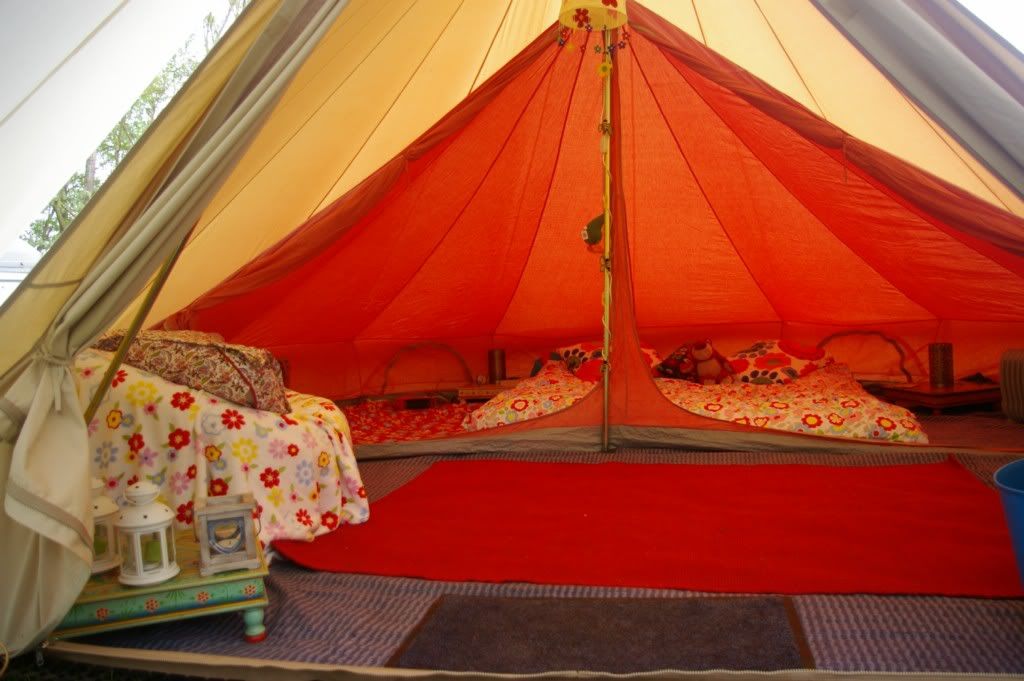
A nice bedspread or fleece will set the tent off - in the bells especially the bed is the main focal point
Drapes also work well, just thread cord through the top panel and make a channel at the bottom. Fix to the centre pole on the bell, and the other end to the loops around the edges of the side wall (there are some better instructions on my blog somewhere!)
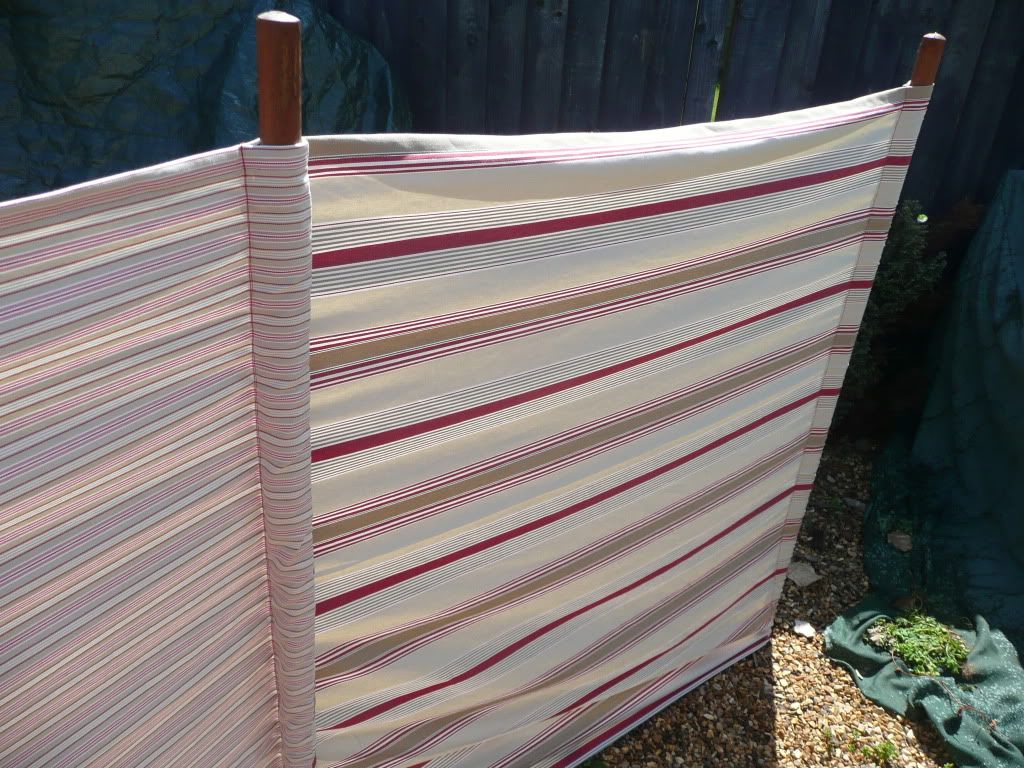
Windbreak
I have just made 2 windbreaks using old poles. You can buy the blue diamond poles though, or make your own if your a bit of a handy carpenter (using broom handles or summat I suppose)
The material I got was from ikea, pick one that is printed on both sides (one side of this is a bit lighter but looks ok)
I couldn't make up my mind so opted for a few different ones and stitched them back together.

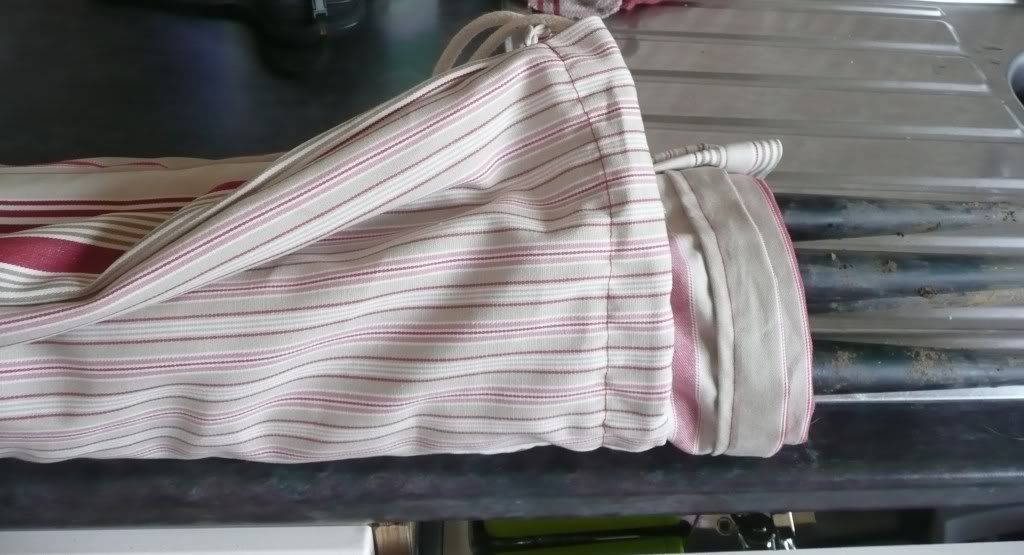
I had enough material left to make a bag as well. All my bags are the same - a rectangle of fabric, sew down the 2 sides and just lay a cord on the top edge, then sew over the cord - knot the ends so the cord doesn't come out. Can make tent, peg, blanket bags in the same way
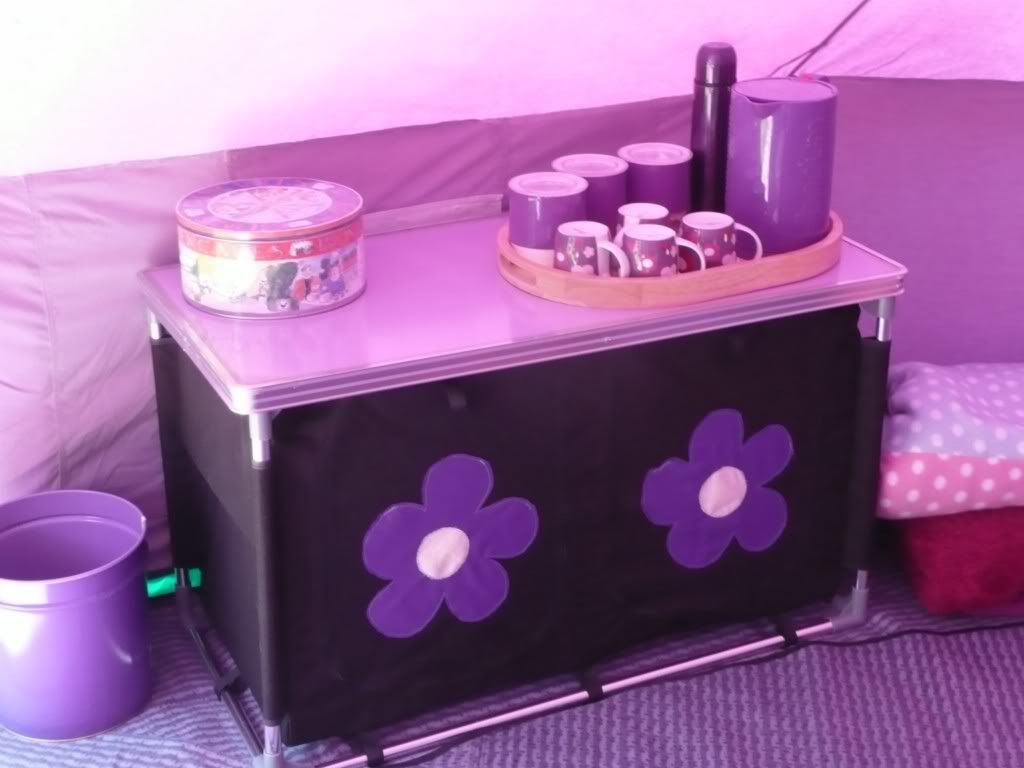
Storage Box
I have had these old pine boxes for years, and used to throw shoes and any junk in them. They were pretty scuffed up and tatty. I got a matchpot paint pot and watered it down. Rubbed it over, then just used some other match pots to paint random flowers on. I added a layer of liming wax at the end to give it a bit of protection

in use
Fleece Blanket
I had a lot of fleece blankets in all colours, but all were fairly small so weren't that useful. With 2 scruffy hairy labs I need to cover the bed sometimes (when they are dripping wet and covered in mud) so needed something easy to wash and dry
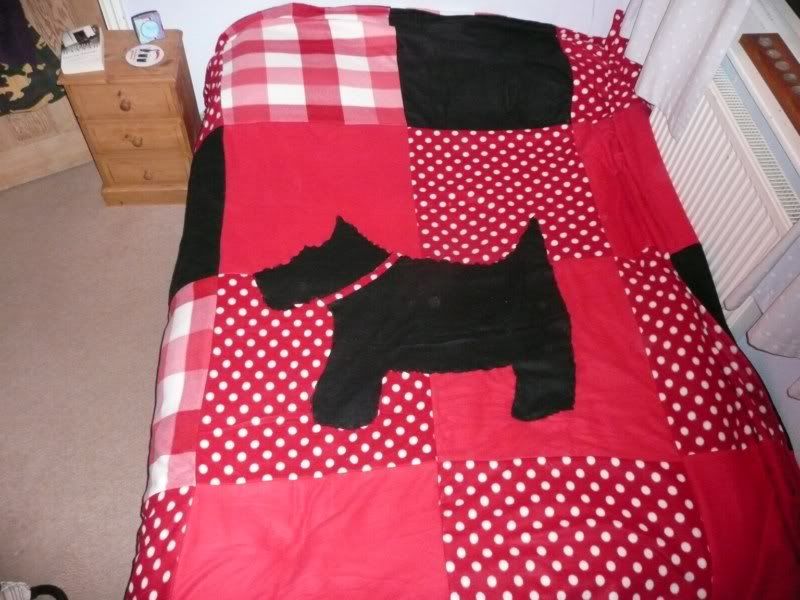
I cut up several blankets in different colours into even sized squares. I then mapped out where they were going and made 2 large blankets. These were then sewn together to make a huge double thickness reversible blanket
You can see the first blanket on the floor of Harry here
My second attempt was more co-ordinated and I had enough to make a bolster cover (and a floor cushion cover)

folded size
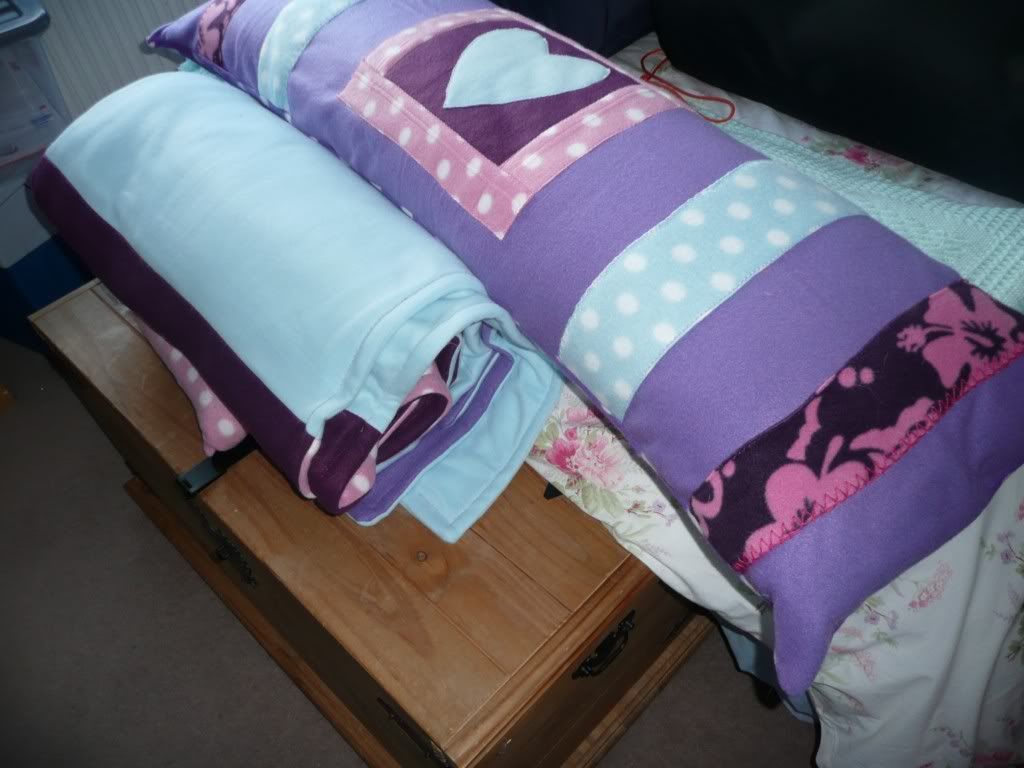
They are really warm and cosy, I always take them camping. The bolster cushion is great if you have room to transport one. It's a pain trying to read a book in bed when camping with no back support
Latest addition for the winter
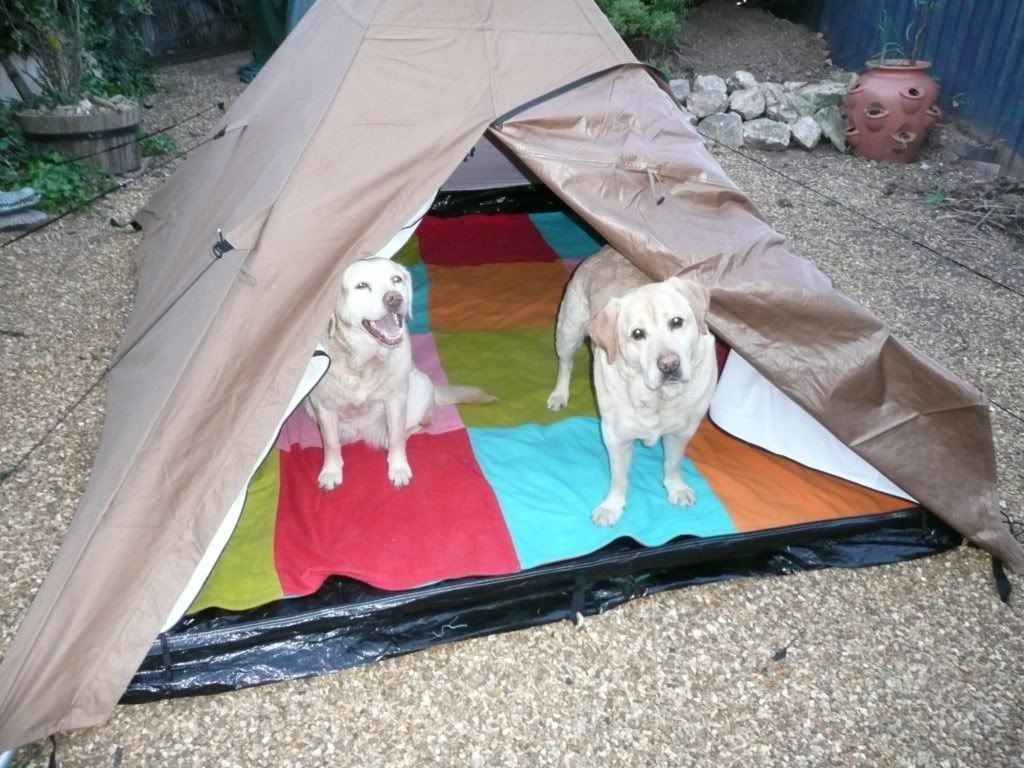
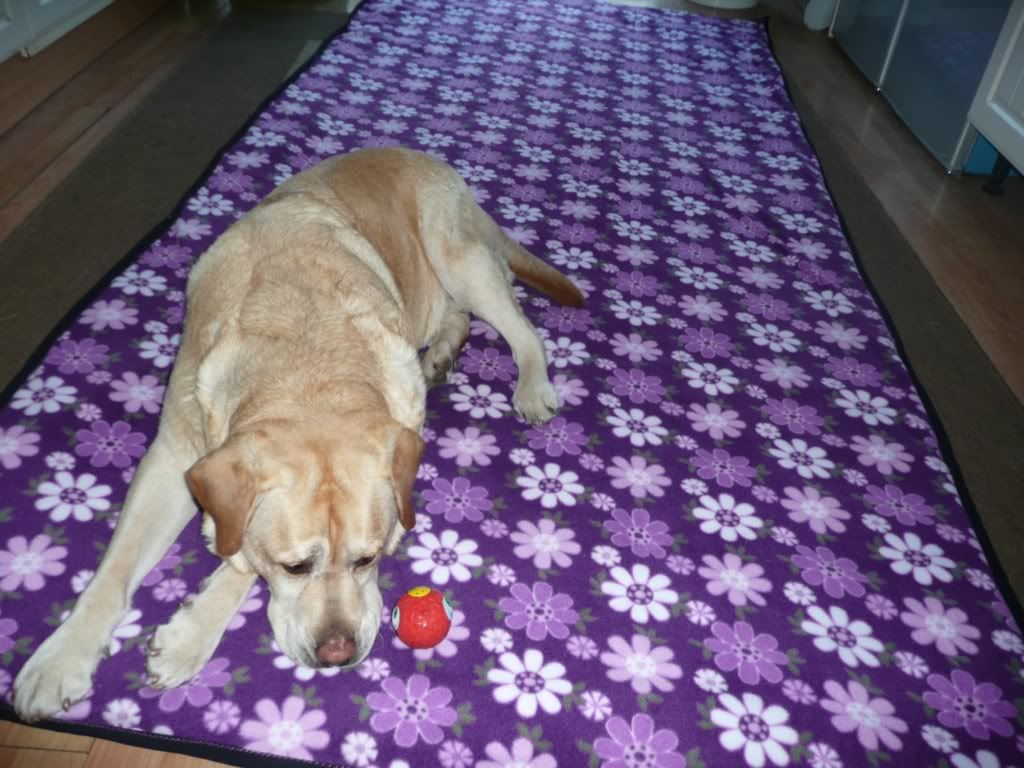
Tent Carpet
These were made from fleece, backed with wadding. My first attempt I put a waterproof nylon on the back. Practical but useless on slippy groundsheet, it turns into a ice skate, so has been relegated for outdoor picnic use
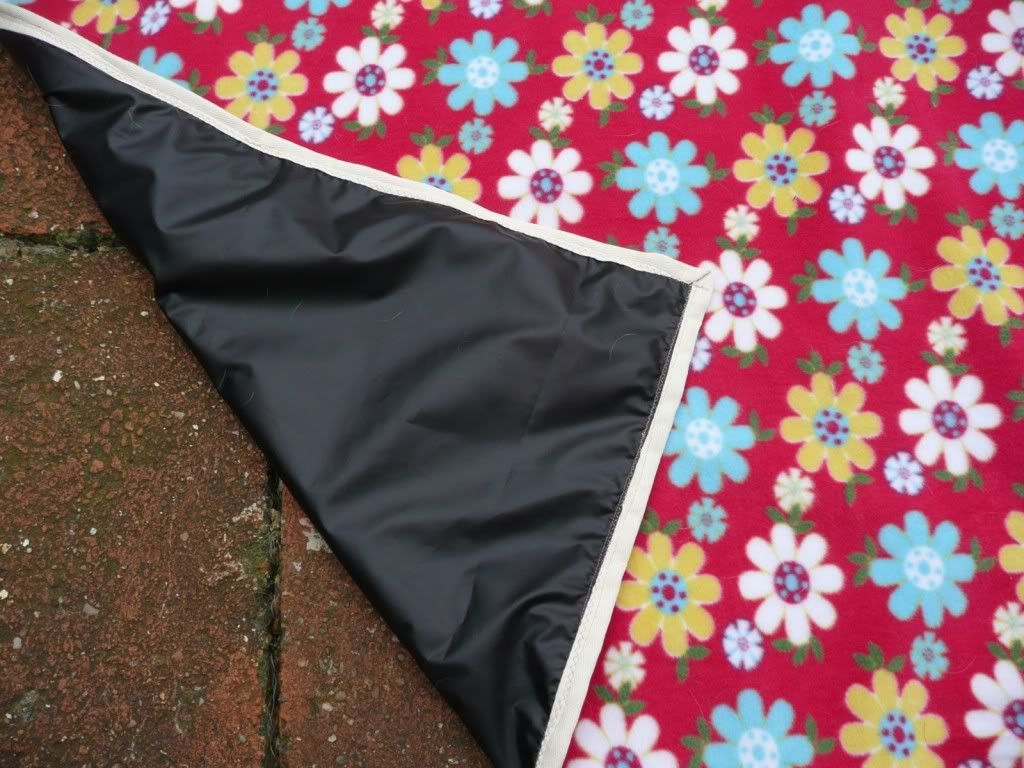
The second attempt I backed with calico, this is much more useful. I still put this one outside but has never really got damp. Homer likes it anyway
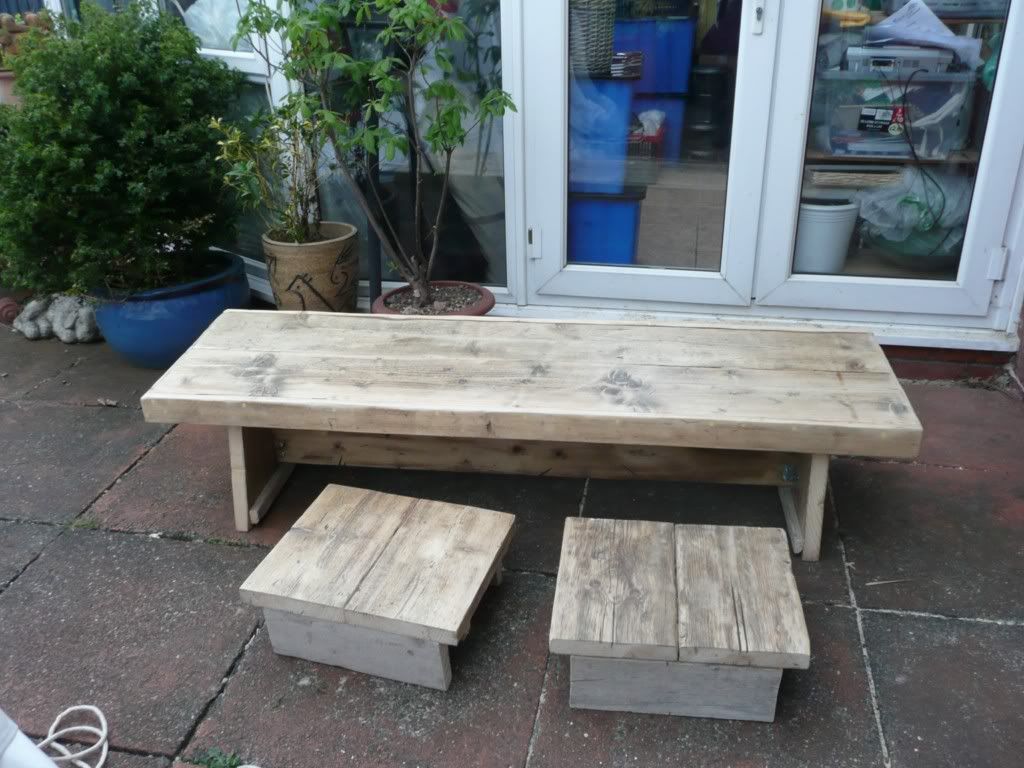
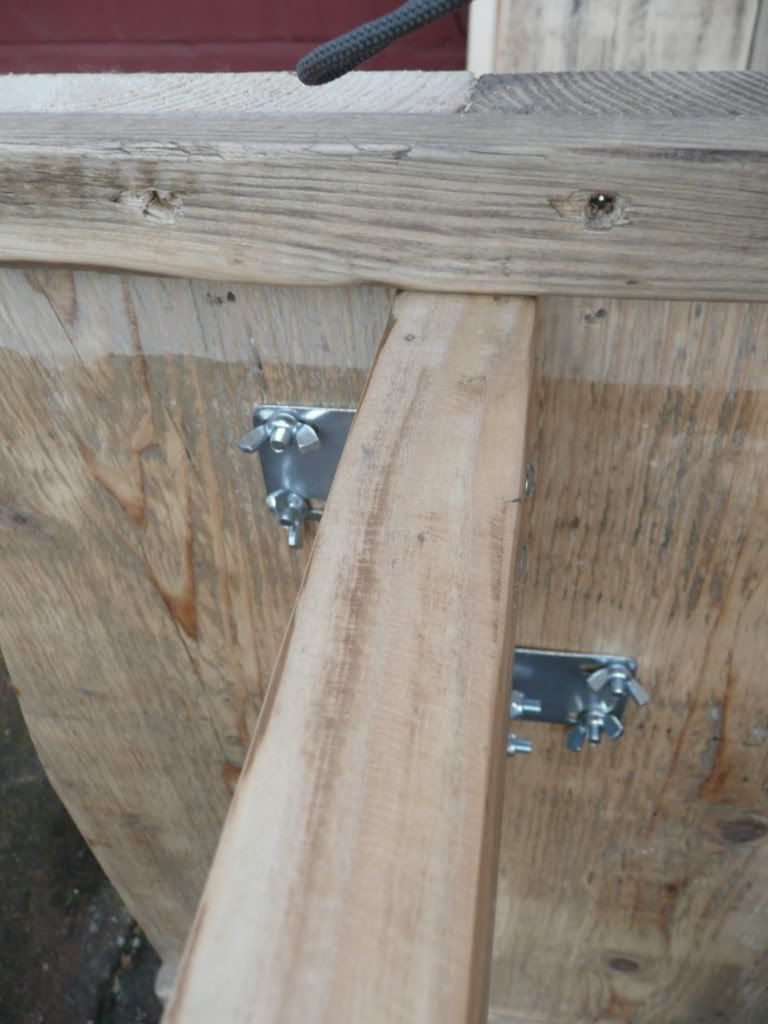
My Wooden Table
My large wooden table was off ebay. I bought the table top and asked if he could cut a few planks to match that I could just sit the surface on, but it needed to come apart for tranportation
He went one stop further and put several angle clamps on it with wing nuts. 8 wingnuts hold it together, about 5 minutes to set up. It's actually made from old scaffold planks, cheap and cheerful but i liked the driftwood effect
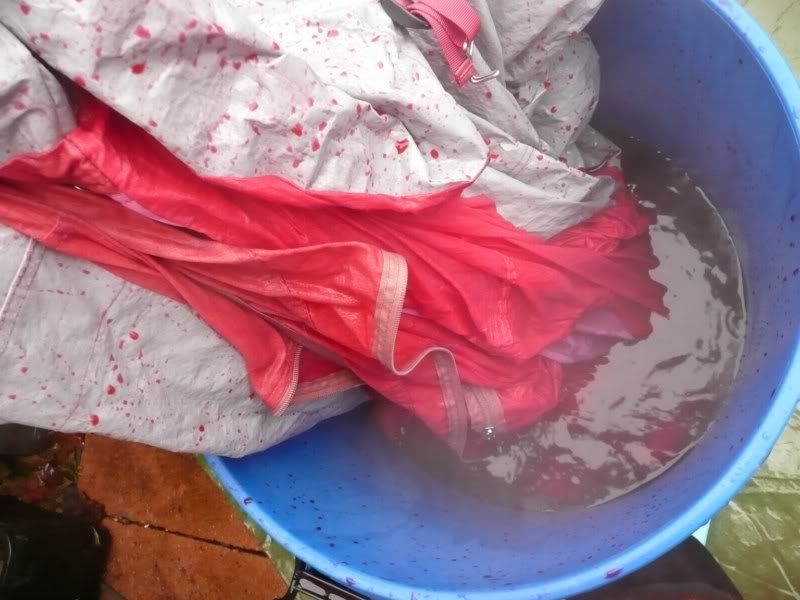
Dying the inner tent
I didn't particularly like the look of the inner tent in the bell so decided to dye it. It was done using normal dylon machine dye
- unfortunately it didn't fit in the machine though, so my garden resembled a chain saw massacre...
I used a large dustbin instead

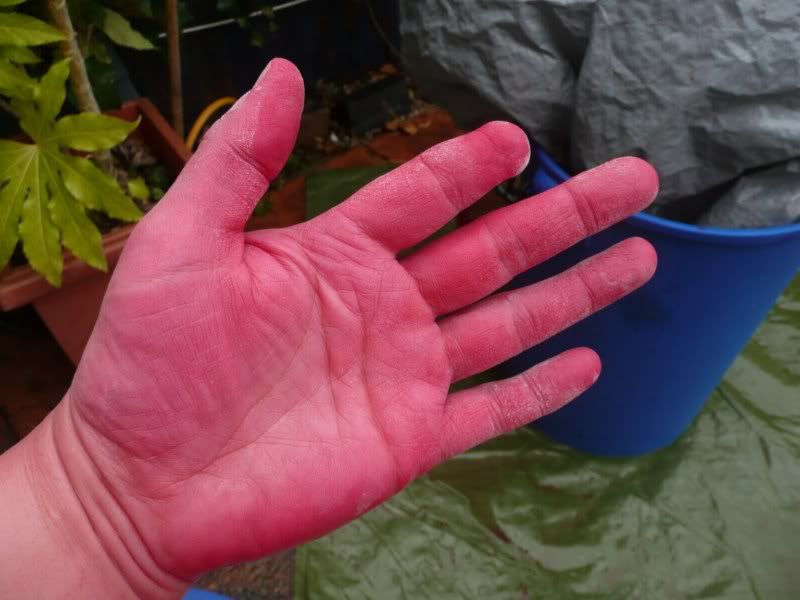
10 days later i got the red stain off my hands..
In use
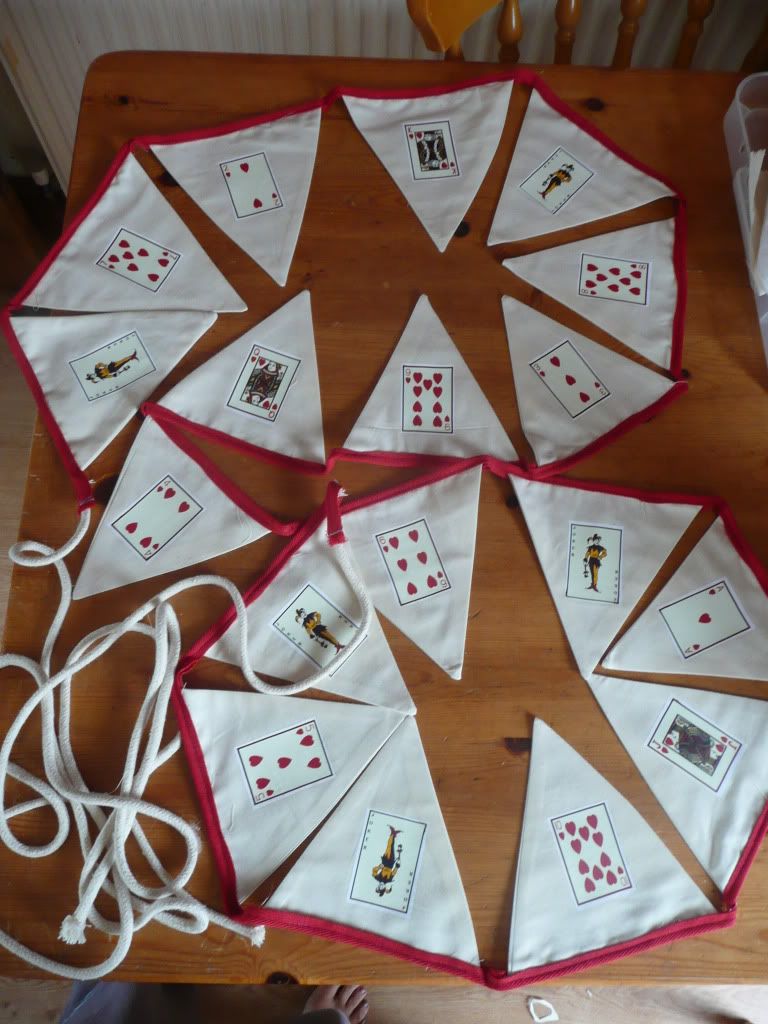
Making bunting
Bit of a tedious job but it's pretty easy. Use any spare remnants (don't buy FQ (fat quarters) on ebay they are a right rip off!), old curtains etc will work just as well. Cut each into a triangle and just stitch round the edges. Stitch bias binding across the top leaving plenty at the ends to wrap around guy ropes etc.
You are not limited to just fabrics, transfers work well
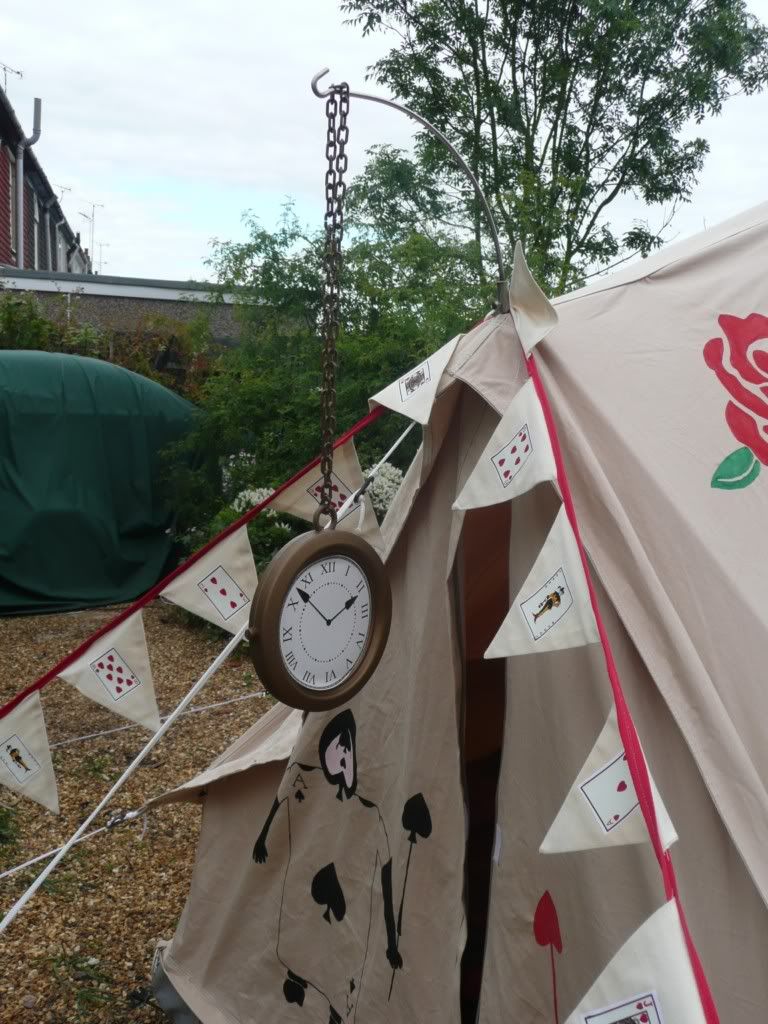
Here is the alice bunting I made with a transfer (ebay again) A4 sheet of playing cards
Replacing Guy ropes
Not really glamping, but most of the bells come with rubbish nylon guy ropes and black plastic guys. I usually replace them with polyhemp rope and wooden sliders.
Wooden Sliders
They also sell wooden dollys, pegs etc. Just makes it all look a lot chunkier and authentic.
Check how many you need but 20 sliders should give you a couple of spare on a 5m bell - approx 15 guy lines. You can't order online but Julie is pretty helpful by email: julie5557@hotmail.co.uk
I ordered the 100mm with 8mm hole sliders.
Polyhemp Rope
You need about 2-3m per guyline, add an extra 1m for each of the front guys - I ordered the 6mm polyhempex rope from Timko.
Look at getting about 50m for a 5m bell - its more annoying falling short and paying another lot of postage - any spare always comes in handy
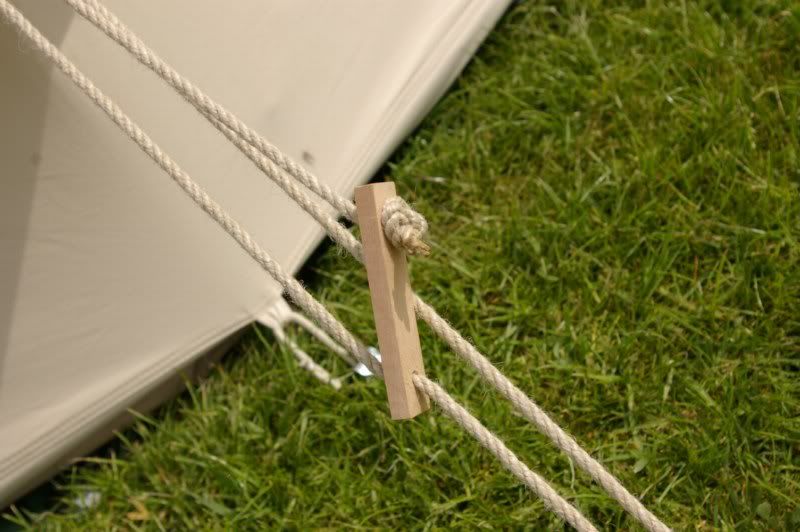
These are also excellent quality if you don't want to make your own rope and sliders: http://www.diejurte.com/product/5-m-hemp-guy-rope-with-stay/
Knitted Blanket
Knitting or corcheting a huge blanket is useful as well. Gives the whole tent a focus and practical for the cold nights. The first bell tent project I ever did was knit this over the winter. All squares were done individually and personalised with family members initials, and pictures of things I like. The back was just lined with a double sized red sheet, to hide all my knots and scraggy ends.
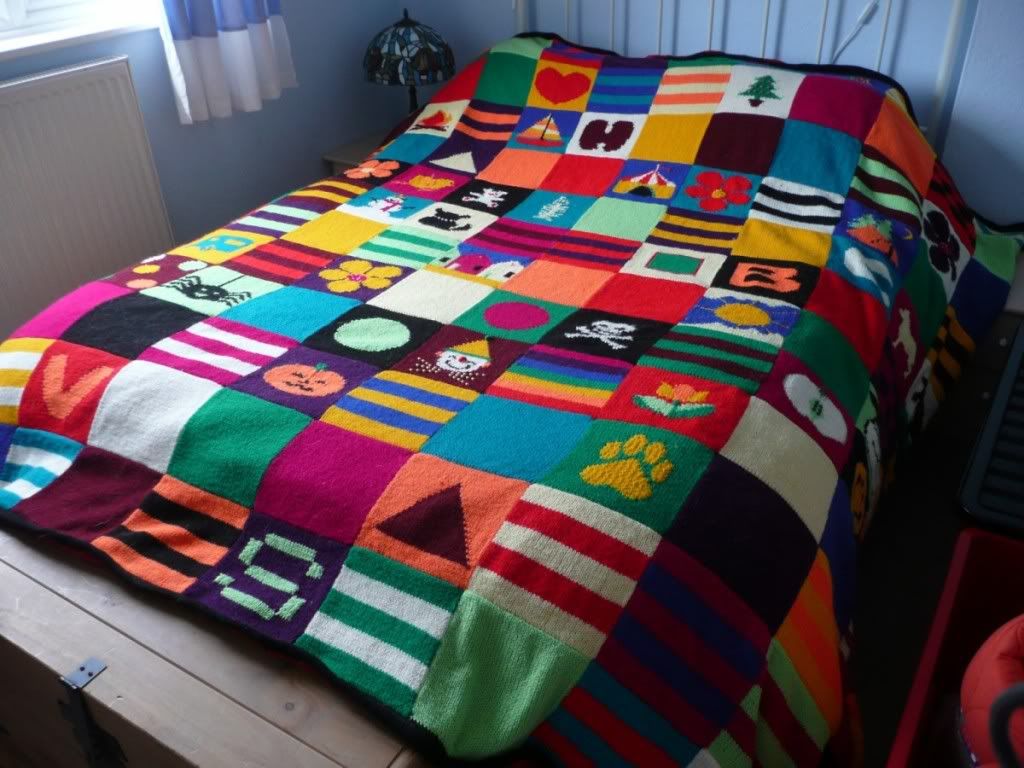
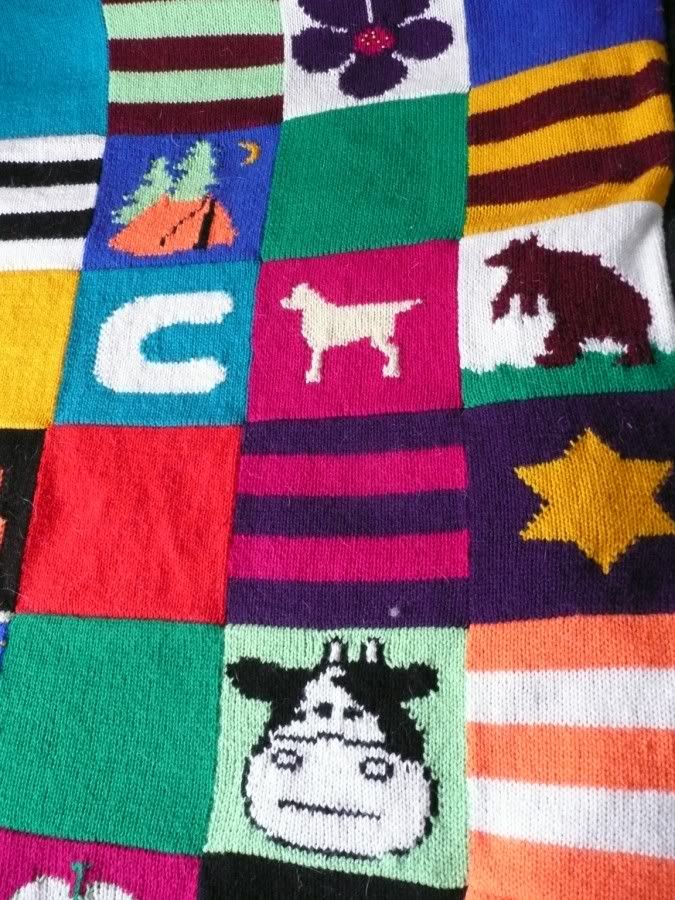

I took the basics from More Blankets & Throws by Debbie Abrahams, size of the squares etc and a few of the pics are good. The rest were just doodles I drew on graph paper.
A new hobby in the last 12 months - a bit of crochet..!
I appear to be better at circles than squares, so a circular blanket was an obvious choice
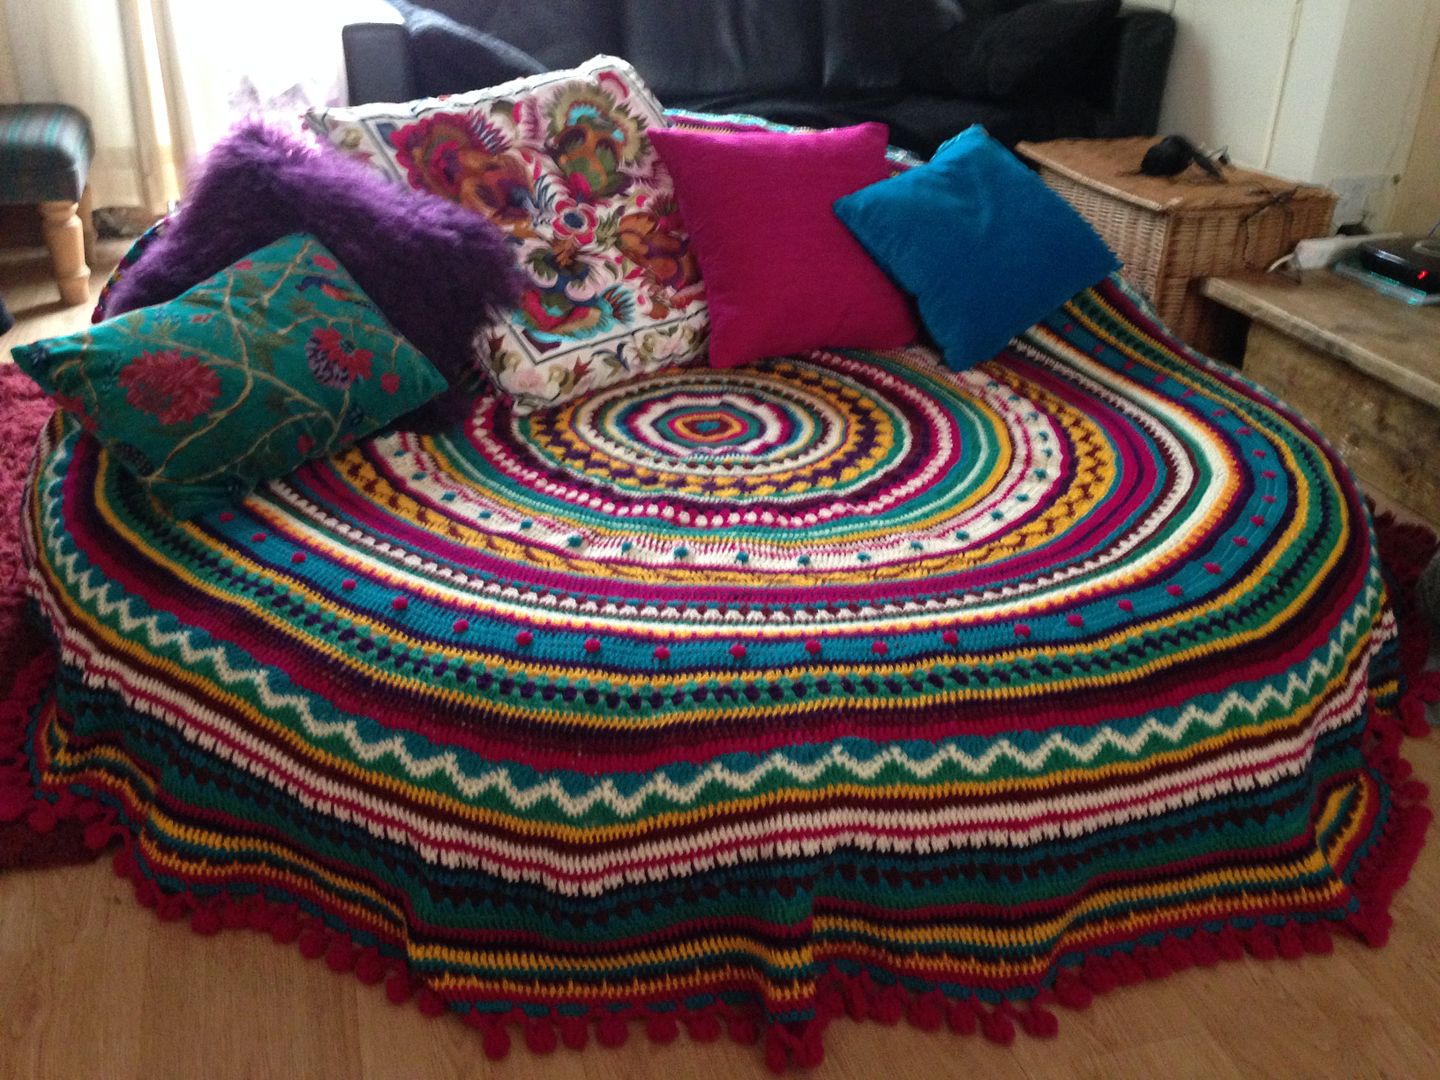
The circle was a bit hit and miss and made up, but there are loads of tutorials with advise on how to crochet a round.
The stitch types were loosely based on this tutorial http://notyouraveragecrochet.com/as-we-go-stripey-blanket/
And the pompom edging was taken from here (I'm a bit obsessed with pompom edging...)
Loads more pics of the finished blanket in this blog page
Storage
It's easy to 'tart' up the camping cupboards as well. Stick or stitch simple applique patterns (easy to cut a flower out of fabric) onto them, they look a lot less boring


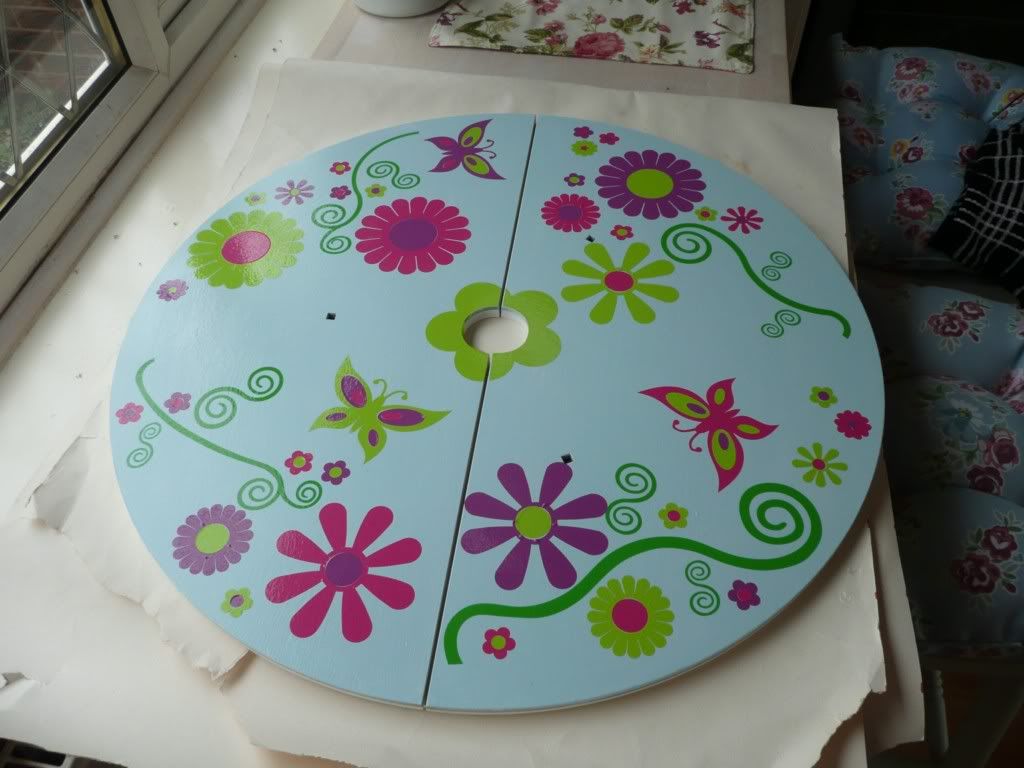
A DIY painted table.....
(blog here)

Bell tent clamp table
You buy this 'unfinished' with a plain mdf top which works out the cheapest option. Then just let loose with your own paint and design (you can get the laminated white version if you dont want to personalise it)
read more here
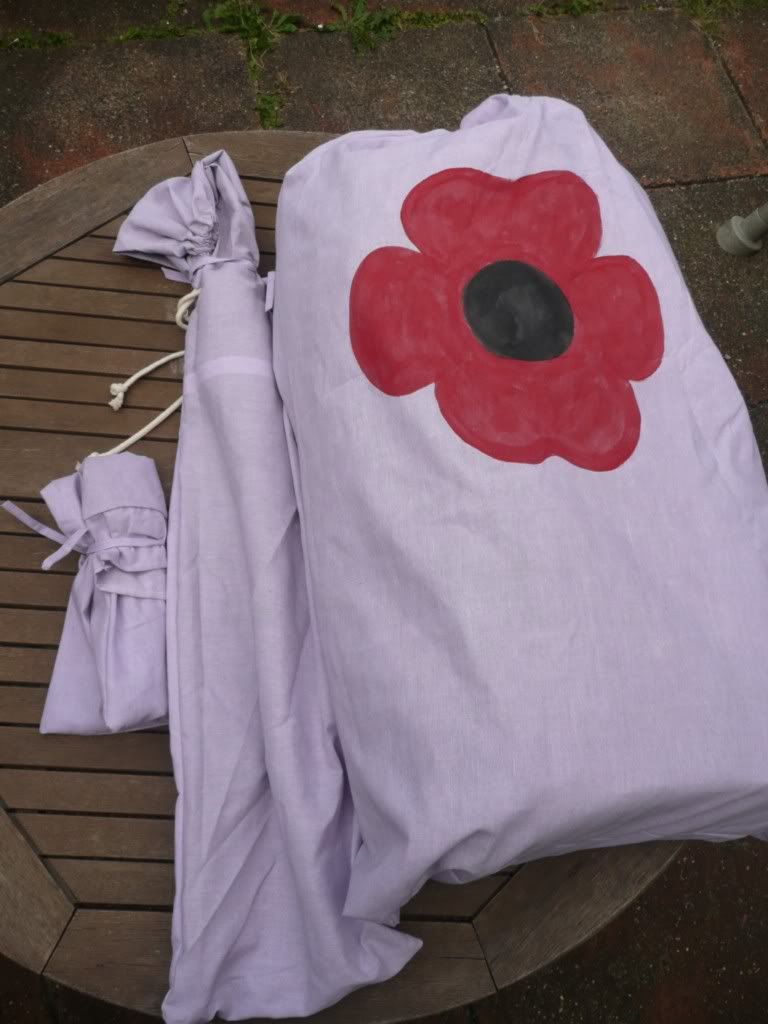
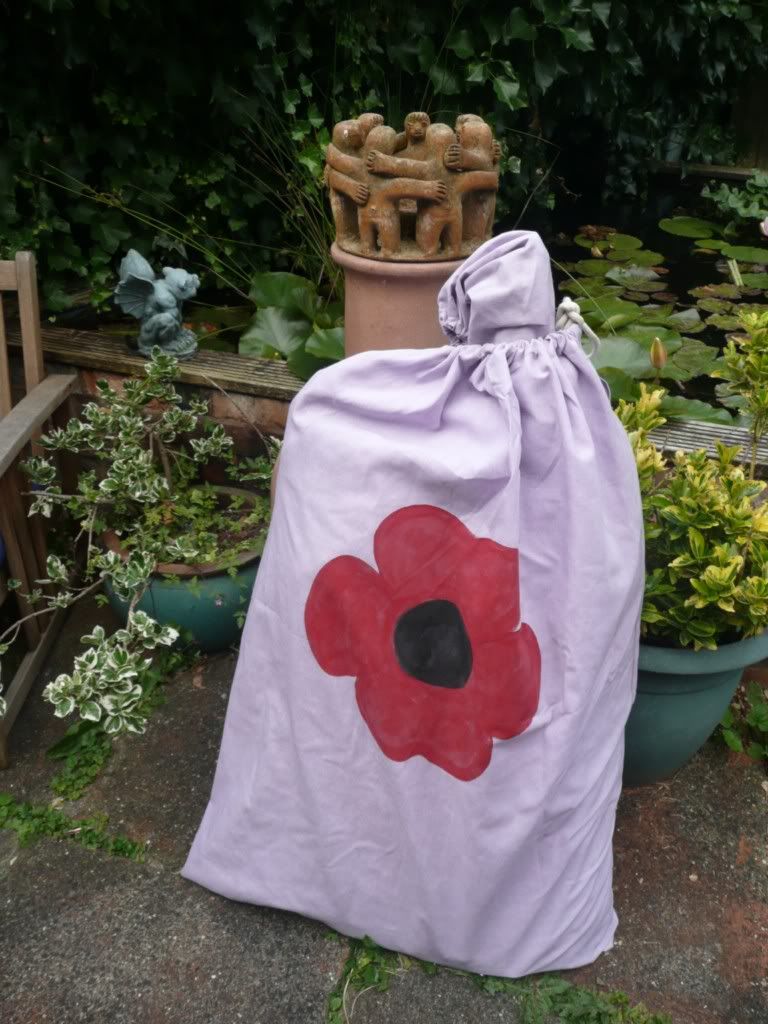
Tent Bags
Very easy to make up on the sewing machine in about 10 minutes
So from this horrible lot....
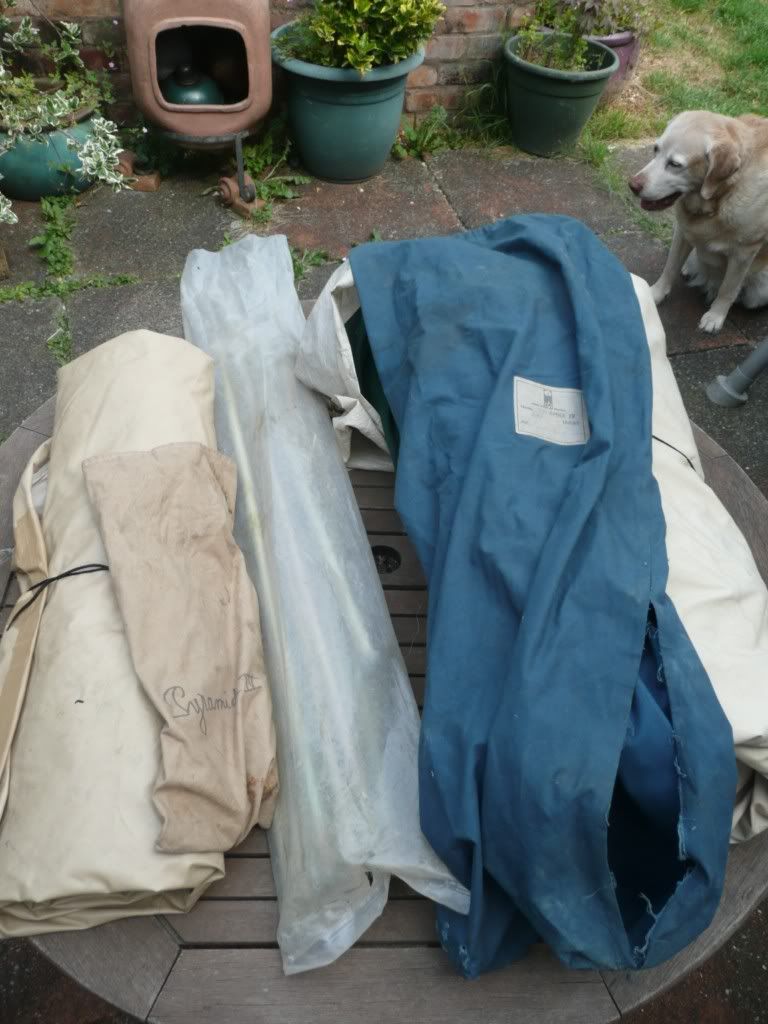
To a nice matching set (which is a lot roomier so no fights to get it in the bag) - using an old wardrobe cover cut into a large rectangle and some piping cord from dunelm mill
Replacement wooden bell tent poles
Available here
Latest project was to shabby chic an old table - more details here
http://bellsandlabs.blogspot.co.uk/2014/01/remember-meim-still-around.html

Another re-vamp. Steamer trunk
Before

After


